
Installing recessed lighting in an existing ceiling can transform your space, adding a modern, sleek touch.
Whether you want better illumination in your kitchen, living room, or hallway, this task can be done on your own with the right tools and know-how.
Follow this guide to install recessed lights that will elevate your home’s ambiance and functionality.
Gather Your Tools and Materials
Before starting the installation, gather all necessary materials.
Recessed light fixtures come in various sizes and styles, so choose ones that suit your ceiling and lighting preferences. Here’s what you’ll need:
- Recessed light fixtures (trim, housing, and bulb)
- Electrical wire
- Wire connectors
- Drill with a hole saw attachment
- Tape measure
- Pencil for marking locations
- Screwdriver
- Circuit tester
- Ladder
Having all the necessary materials at hand will save time and make the installation process smoother.
Plan Your Layout
Once you’ve gathered your materials, it’s time to plan the layout.
Position the recessed lights evenly for consistent lighting, typically four to six feet apart. The exact spacing will depend on the room size and bulb wattage.
To simplify this, use a free recessed lighting calculator to determine the optimal number and placement based on your room’s square footage.
For a more personalized plan, lighting professionals can offer tailored calculations to meet your specific needs.
When planning your layout, also consider the furniture placement.
Avoid placing lights directly above large pieces like couches or tables. Instead, aim to highlight key features such as artwork, bookcases, or accent walls.
Turn Off the Power
Before starting any electrical work, make safety your top priority.
Head to your circuit panel and switch off the power to the area where you’ll be working. A circuit tester is handy for double-checking that the power is completely off.
Never skip this step, even if it seems obvious. Working with live wires can be extremely dangerous.
Cut Holes in the Ceiling
Now, it’s time to cut holes for your recessed lighting. Start by measuring and marking the center of each light.
Use a tape measure to mark the spots where the lights will go. Make sure the spots align with your layout, taking into account the space between lights and the room’s overall balance.
Once you’re confident with your placement, use a drill with a hole saw attachment to cut the holes. Be careful not to make the holes too large.
The light fixtures need to fit snugly, so it’s essential that the holes are the right size. If in doubt, double-check the fixture dimensions before you begin.
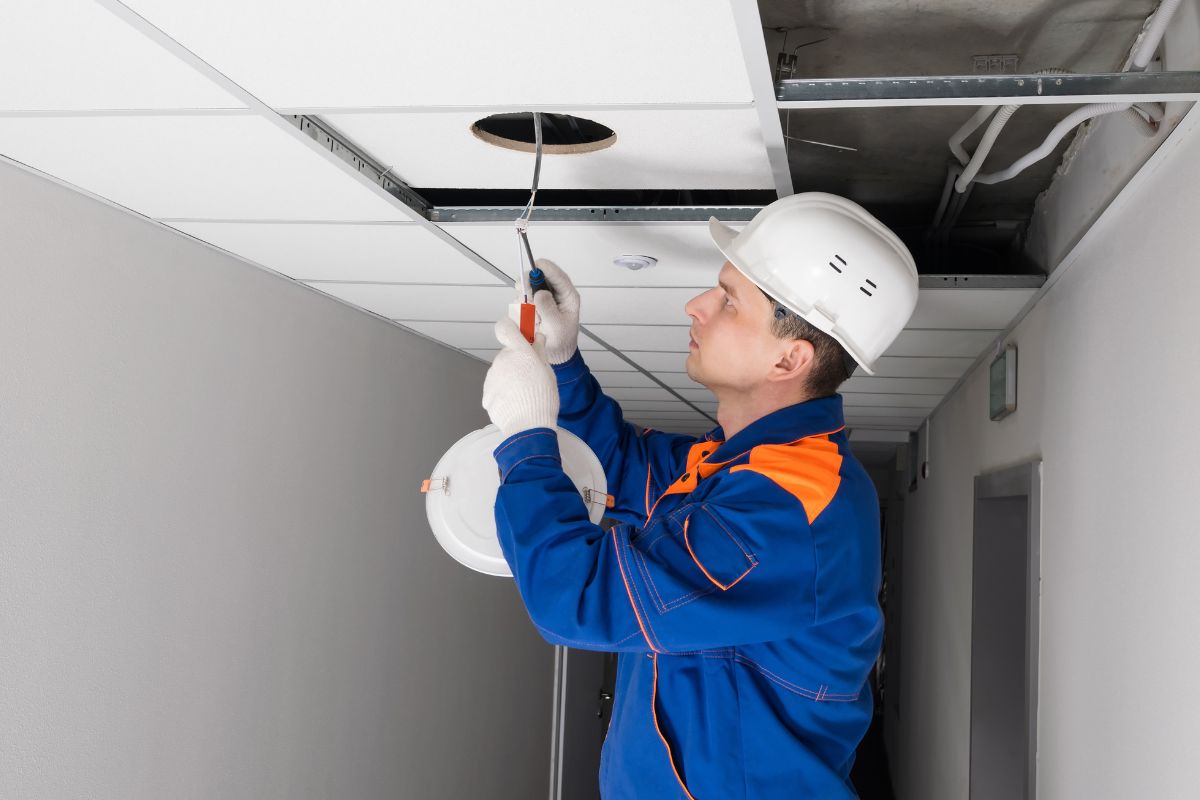
Run the Electrical Wiring
Next, you’ll need to run the electrical wiring from the light fixtures to your power source. This step is critical and should be done carefully.
Begin by running the wire from the power source, such as an existing light switch or junction box, to the locations where the recessed lights will be installed.
Drill small holes in the ceiling joists, if necessary, to run the wire. Once you’ve fed the wire through the ceiling, strip the ends of the wires to expose about half an inch of copper.
Be sure to follow local building codes and regulations for wiring, as it’s essential to do this part correctly to avoid electrical hazards.
Install the Recessed Light Housings
With the wiring in place, it’s time to install the recessed light housings. Insert the housing into the hole you’ve cut in the ceiling.
Most recessed light fixtures come with a spring-loaded bracket or clips that hold them securely in place.
Once the housing is seated, check for a tight fit. The housing should not move or wiggle.

The housing will also have a section where you can connect the wiring. Use wire connectors to attach the wires to the corresponding terminals.
The black wire (hot) should connect to the black wire in the housing, the white wire (neutral) to the white wire, and the ground wire to the green screw.
Connect the Wiring and Test the Lights
After connecting the wires, carefully tuck them into the housing and make sure there’s no exposed wire outside the junction box.
Then, attach the housing’s cover, making sure it’s secure. At this point, you’re ready to test your work.
Turn the power back on at the circuit breaker, and use the light switch to check if your recessed lighting is functioning correctly.
If everything’s wired correctly, the lights should turn on without issue. If they don’t, double-check the wiring connections and ensure that the power source is active.
Install the Light Trims
Once the lights are wired and tested, the next step is to install the trim. The trim is the decorative ring that finishes the look of the recessed light.
Most trims are easy to attach with clips or a spring-loaded system. Simply align the trim with the housing and press it into place.
Some trims come with a twist-lock mechanism, so twist the trim until it’s secure.
Trims come in various finishes, from plain white to more decorative chrome or brass. Choose a trim that complements your room’s style.
If you prefer a clean, modern look, go for a simple white trim. For a more classic aesthetic, brass or bronze finishes work well, especially in spaces with a vintage home vibe.
Adjust the Bulbs
With the trims installed, it’s time to insert your light bulbs. Recessed lighting typically uses LED bulbs, which are energy-efficient, long-lasting, and provide excellent illumination.
Choose bulbs that are compatible with your fixtures and meet your desired brightness level.
Make sure the bulbs are screwed in tightly. Some recessed light fixtures have adjustable mechanisms that allow you to direct the light to specific areas.
If your fixture has this feature, adjust the angle of the light to create the desired effect
Do Final Checks and Clean Up
Finally, do a once-over to make sure everything is secure and functioning.
Ensure the lights are working and that the trim is snugly fitted. Double-check that there are no exposed wires or loose connections.
Once you’re satisfied, clean up your work area, removing any debris or dust that may have collected during installation.
You’ve now successfully installed recessed lighting in your existing ceiling.
Wrapping Up
Installing recessed lighting in an existing ceiling is a rewarding DIY project that can enhance the atmosphere of any room.
By following the steps outlined above, you can achieve professional-looking results.
Just make sure to follow the safety precautions and ensure your work meets local electrical codes.
With a little patience and effort, you’ll have a bright, modern space in no time.